The Sinakawak Shrine in Zelda: Tears of the Kingdom contains ‘An Uplifting Device’ puzzles for Link to attempt.
You have to use candles and fire during this test to create hot air balloons, but like most Sanctuary puzzles, this is much harder than it looks.
To speed things up, we have the Sinakawak Shrine solutions for ‘An Uplifting Device’ detailed below, including how to get the chest and the location of the Sinakawak Shrine if you need to find it first.
In this page:
To view this content, please enable targeting cookies. Manage cookie settings
Watch on YouTube
For more help, you can visit our Tears of the Kingdom walkthrough.
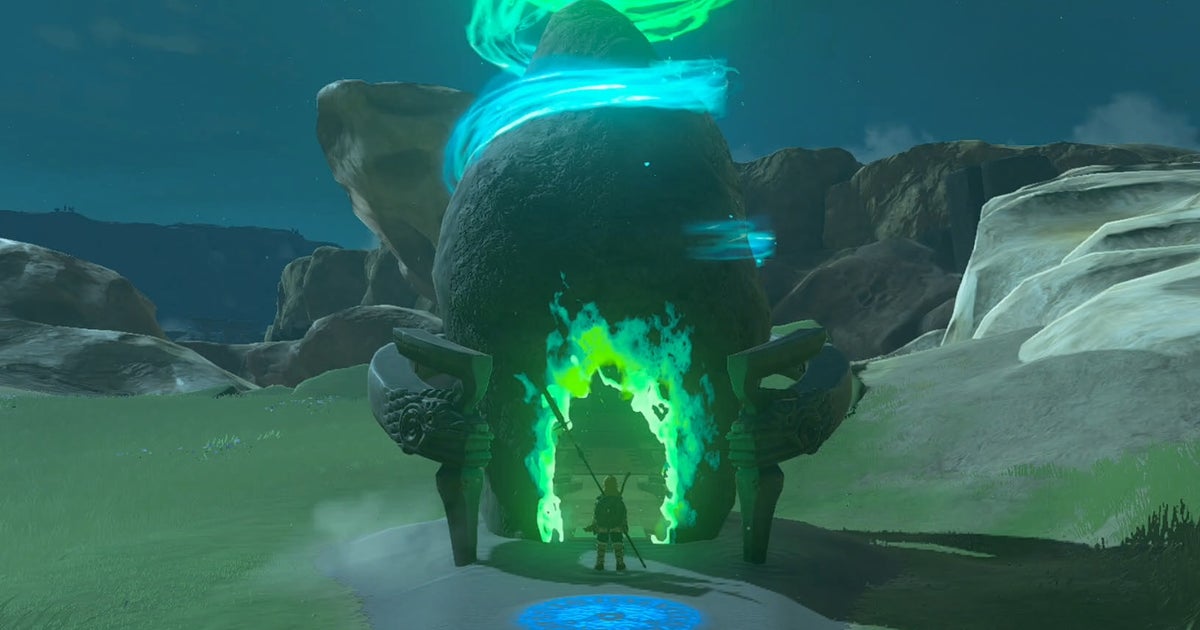
Zelda Tears of the Kingdom Sinakawak Shrine Location
The Sinakawak Shrine in Tears of the Kingdom is located to the right of the New Serenne Stable on the surface of Hyrule Field, northeast of the Hyrule Ridge area. The precise coordinates of the sanctuary are (-1413, 0757, 0089).

This is where you can find the Sinakawak Shrine on the Hyrule map. | Image Credit: Nintendo
Solution to the Sinakawak Shrine puzzle in Zelda Tears of the Kingdom
There are three puzzles you must solve in Sinakawak Shrine to reach the end and obtain the Light of Blessing, and an optional puzzle to reach a chest. Here’s how to solve all four puzzles:
Sinakawak Shrine Puzzle Solution 1
To solve the first puzzle in the Sinakawak Shrine, you must combine balloons, wood, and candles to create a floating platform and reach the top of the room, but be careful! It is very easy to burn wood with a candle. It’s annoying if this happens, but the wood goes back to where you found it, so you can try again.
The first step here is to attach a small rectangular piece of wood to the center of a larger square shaped piece of wood. You can get this wood by using Ultrahand on the surrounding ramps.

Image Credit: Nintendo
Next, use Ultrahand to attach two of the balloons to either side of the rectangular piece of wood in the middle of your creation. Move your creation close to the wall if it isn’t already there.

Image Credit: Nintendo
For the last part of this puzzle, you need to place two candles on the edge of the square piece of wood, near the balloons. We recommend standing on your creation to place the second candle, as it will begin to float when you bring the candle closer to the balloon.


Image Credit: Nintendo
Jump from your creation to the area above as you approach the top of the room to continue.

Image Credit: Nintendo
Sinakawak Shrine 2 Puzzle Solution
The second puzzle is the quickest to solve, as all you need to do is use Ultrahand to bring a balloon to the door, then place a candle on the balloon to make it float, and press the switch above.


Image Credit: Nintendo
How to get the chest at Sinakawak Shrine
Before starting the last puzzle, you may want to first get the bonus chest in the Sinakawak Shrine. To access the chest, you must take the large ball located on the lowest floor of the next chamber to the upper floor, and place it in the large hole.
To do this, drop down to the bottom floor and use Ultrahand to bring a balloon to the flame area, hiding behind another wall. Use Ultrahand again to bring the metal ball closer to the opposite wall from the flames, then connect one of the streams of fire to the ball.

Image Credit: Nintendo
The last step is a little tricky to do, but your goal is to attach the balloon to the ball so that the jet of fire points at the balloon, making it float towards the ceiling.

Image Credit: Nintendo
Once you’ve floated the balloon, go to the ladder on the opposite side of the room and go up and around to where the ball and balloon stopped, then separate the ball and place it in the large hole, opening it up. the nearby door.


Image Credit: Nintendo
That chest is finally yours! Go through the door to open it and get an opal for your troubles, then move on to the final puzzle.
Sinakawak Shrine 3 Puzzle Solution
For the final ‘Lifting Device’ puzzle in the Sinakawak Shrine, you need to do exactly that and create a platform for the small metal ball to float on, then place it in the small hole in the ground.
The first step is to slide down to the bottom floor and place the small metal ball in the center of the piece of wood with Ultrahand, then place four candles on each of the four edges of the piece of wood.

Image Credit: Nintendo
Then, place one of the balloons on the edge of the piece of wood and watch it float.

Image Credit: Nintendo
Use the ladder at the back of the room to go up and around the floor above and detach the small metal ball from your creation, then place it in the small hole in the floor.


Image Credit: Nintendo
The door next to you will open and you can finally examine the green circle at the end to get your Light of Blessing.
Good luck completing other Shrines in Tears of the Kingdom!
To view this content, please enable targeting cookies. Manage cookie settings
Categories: Guides
Source: ptivs2.edu.vn