The Crossguard stance is part of the combat system in Star Wars Jedi: Survivor, which has evolved from Fallen Order. It now introduces various stances that diversify combat and open up a variety of new moves and abilities.
While some stances are available from the start, others must be unlocked through story progress and the secondary objective. The Crossguard stance is one of those found as part of the main story progression in Star Wars Jedi: Survivor.
In this guide, we will explain what the Crossguard Lightsaber stance is, how to unlock access to Shattered Moon and acquire the Crossguard stance for yourself; Do not hesitate to go to the section on how to acquire it if you prefer to learn how it works. It works in the game yourself.
In this page:
Star Wars Jedi Survivor – DF Tech Review – PS5 vs Xbox Series X/S – Ambitious but compromised
Cross Guard Stance in Star Wars Jedi Survivor Explained
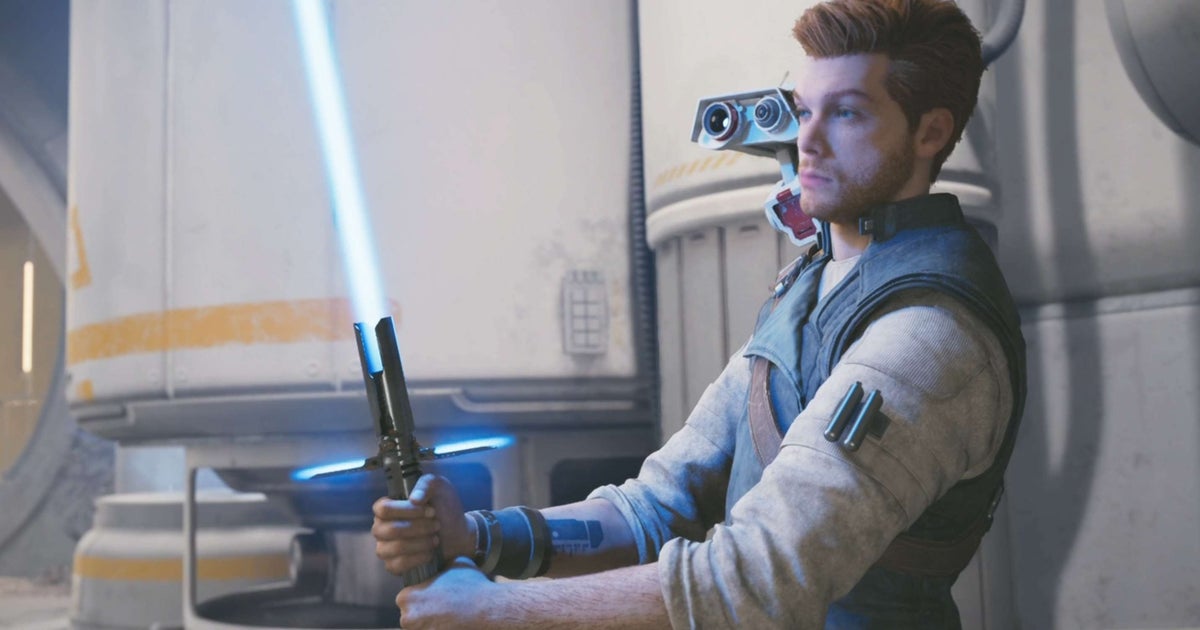
The Crossguard Stance is another selectable option for Cal’s two stance slots and offers additional skills and abilities, as well as an alternative way to fight.
The Crossguard stance opens up a harder-hitting, slower-paced fighting style that deals more damage per hit than other stances, perfect for breaking through enemy defenses.

The Crossguard Stance skill tree and the ‘Rending Strike’ skill.
As mentioned, there are additional skills available, unlocked through the stance’s own dedicated skill tree, with skills like ‘Rending Blow’ allowing you to ‘deal a single, high-damage strike with a long swing’ when using the standard attack.
Do you need help with camera puzzles? Check out our walkthroughs for the Chamber of Clarity, the Chamber of Reason, and the Chamber of Duality. We also have guides to help you learn how to enter the Forest Array and solve the Uhrma Crypt puzzle. Do you want to travel in style? Then you can learn to tame and ride animals. If you want to upgrade your weapons, we can show you how to get Quickdraw Blaster and Crossguard Stance too. Upgrades like this can come in handy when you need a strategy to defeat the Rancor.
How to unlock Shattered Moon and get Crossguard Stance in Star Wars Jedi Survivor
You’ll be glad to know that acquiring the Crossguard stance is relatively simple and is something you’ll come across naturally as part of the story progression.
You will know when you are close to reaching its unlock point, since it is after completing the main objectives on the planet Jedha; you should be in the Archive after this point.
You are then given two main objectives: one of the two will ask you to go to Shattered Moon, and it is in this place that you will find the Crossguard stance.


Left: The two objectives given after completing the main objectives in Jedha. | Right: The location on the Superstructure Fabrications map, where you will acquire the Crossguard stance.
Once there, continue following your main objectives until you reach a building with a dome in the ‘Superstructure Makers’ area; there will be a meditation spot just outside and the building is reached by crossing a gap using two ropes hanging from above.
Meditate and rest before entering to restore your health, strength, and stim packs, then enter and pick up the device in the left corner of the room; after this, you will trigger a boss fight which you will need to complete in order to acquire it. the posture.

Cal fighting the boss before going into the Crossguard stance.
Once the boss is down, a cutscene will play where Cal will head to the nearby workbench, play with some tools, and customize his lightsaber to unlock the Crossguard Stance so he can use it.

Acquire the Crossguard stance.
You’ll be able to try out this stance against some enemies as you progress to the next objective before the game asks you if you want to equip it. If it’s not for you, you can choose not to equip it and it will be free to change it every time you use a meditation point.
Enjoy your new combat game style!
To view this content, please enable targeting cookies. Manage cookie settings
Categories: Guides
Source: ptivs2.edu.vn