Assassin’s Creed Origins Tomb Locations and Solutions: Menkaure, Khufu, and More
The Worshiper of the Tomb of Thoth
This tomb is located in the northwest corner of Giza, at the foot of the mountains.

As you pass through the opening areas, you will encounter minor resistance from the bandits. Avoid or eliminate them and follow the path until you reach a room containing a pair of wooden platforms suspended by ropes.
Your goal is to raise the bottom platform into the air and weigh the other one down to keep it in place. Remove the rope spools from the lower platform, then climb the scaffolding and climb to the higher platform. Once his weight has knocked him to the ground, move the rope spools over him to weigh him down, then jump off the scaffolding to the higher platform.

The Ancient Tablet will be in the front room.
Golden Tomb
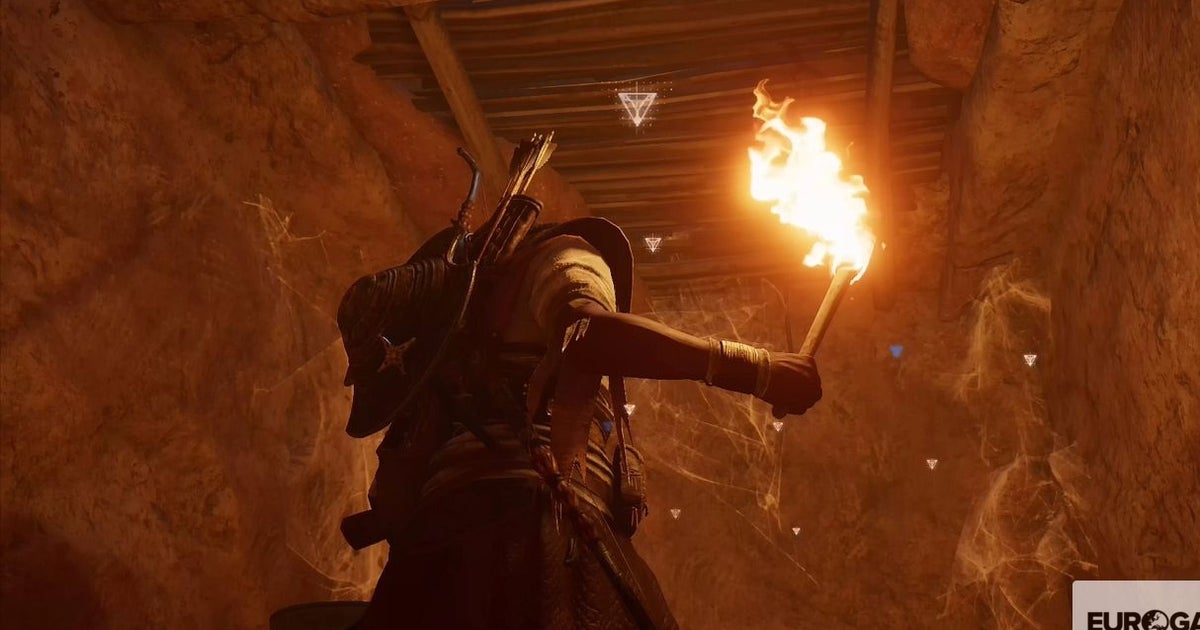
You will find this tomb in the Isolated Desert; Break the cracked wall to create an entrance.


Enter, following the beam of light that bounces off some bronze mirrors on the wall. At a couple of points you’ll have to move a rack of jars to get the next mirror into place, and the last mirror is covered in cobwebs; Wave your torch at them to clear it.

old mechanism
After you have read the Ancient Tablet, go deeper into the caves. Turn left at the crossroads and follow the path to the end.
Tomb of Nomarca
The entrance is located in the Black Desert in the southern part of its border with Faiyam.

Make your way through the tomb until you reach a room containing a boat/outrigger contraption. Make sure the end near the two braziers is facing down, then push the jar rack under the raised end to hold it in place and use it to reach the floor above on the left. (Place it in the other direction first if you want to get additional loot.)

Break the cracked walls to find your way to the Ancient Tablet.
old mechanism
From the tablet, break the cracked wall on the right and follow the passage, turning left at the junction ahead.
Tomb of Seth-Anat
You’ll need a bow with the On Fire perk or fire bombs for this one. Head to the middle of the Desheret Desert and you can’t miss it.

Starting from the western end of the trench, climb up to the upper platform on the left side, and when you reach the break in the beam, grab the stone block in the alcove and drag it out. Continue following the beam and dragging blocks as necessary until you reach a mirror covered in cobwebs.
Use your torch to clear it and then continue. Another block to knock over, and then another one full of cobwebs, but this one is inaccessible, so use a fire bomb or flaming arrow to clear it and continue your progress until you reach the Ancient Tablet.

old mechanism
In the tablet room, burn the cobwebs on the mirror high on the wall, then follow the beam to locate the mechanism.
Tomb of Amenemhat III
This tomb is located in the southwest corner of the pyramid at Haueris Nome.

Follow the hallway until you reach a large room with a couple of bamboo panels on the floor. Drop your torch on them to set them on fire, then drop inside and break the stone seal at the end of each hole.

Go back up and go through the now open door, and you will come to a brightly lit area with a pond. It’s infested with crocodiles, of course, so deal with the enemies before you go swimming.
Dive below the surface to find a submerged tunnel. Swim along it and the tablet will be underwater at the end. Don’t worry if you are running out of air right now, as interacting with the tablet will fill your lungs.

Djoser’s Tomb
Djoser’s tomb is located on the north side of the step pyramid at Saqqara Nome.

The path is quite simple; Continue moving through the tunnel until you reach the room full of sacks. To the far right is a shelf with jars that can be moved to reveal an exit. Follow the passage down and around until you reach a junction; the path to the right is a dead end containing some loot behind another shelf jar, and the path to the table continues to the left.
When you reach the large dark room, grab the Silica and other assorted loot, then use an Animus Pulse to locate the weakened section of the wall. Pierce it with your sword and you will emerge in a tiled passage. Follow it until you find more weakened walls to your left; the tablet is behind the first one and the others contain some loot.
Tomb of Khafre
The entrance is on the north face of the central pyramid of Giza.

Follow the path until you reach a small room that appears to be a dead end, then open the hidden passage in the corner. Follow the path down and around, and you’ll eventually reach a room containing a boat/seesaw mechanism.

Move the rack of jars under the raised end of the boat to hold it in place, then use it to reach the platform above.

The tablet is in the small room in the center of the larger room ahead, and that larger room contains a lot of loot.
Tomb of Cheops
The entrance is on the north side of the northernmost pyramid of Giza. You will have to visit twice to get the tablet and mechanism here:

Tablet: When the path forks, take the passage on the left and follow it until you reach a large ramp that goes up. Some loot can be obtained by crawling through the hole in the middle of the ramp, and the way to the tablet is through the hole at the top.
When you reach the dead end in the treasure-filled room, break the two stone seals at the far end to open a secret door. Move forward and the tablet will be right in front of you.

old mechanism
If you’ve completed Hyena’s story quest, you’ve already been here. Head through the narrow gap to the right when the path splits, follow it and drop down the hole, then continue until you reach a large chamber containing the mechanism. (The mummy and other miscellaneous items in the room are related to the story, so you can’t do anything with them at this time.)
Tomb of Menkaure
The entrance to this one is on the north side of the smaller Giza pyramid, and you’ll need firebombs or a bow with On Fire.

Follow the path until you reach a small room full of treasures with some stairs in the middle. There’s more loot in the room below, and above the door you entered through is another opening.

At the end of this passage there is a bamboo trapdoor above you that you will have to burn. Climb up the hole and the tablet will be right in front of you.

Tomb of Smenkhkare
Head to the south end of Haueris Nome and the entrance is in the area full of pillars.

Follow the passage until you reach a pool of water. Dive down and swim through the tunnel ahead and you’ll emerge in a room with several hanging platforms. Your goal is to reach the upper level ahead and to your right, but it is too high to reach without help. Instead, go to the left corner of the room and climb up to the hanging platform. Once it reaches the ground, quickly run to the platform you just raised before it hits the ground and use it to reach the upper level.

Repeat the process on the next set of platforms to reach the upper level, then head out to find the tablet; There will be a couple of bandits waiting for you.
old mechanism
Behind the tablet is a tall, narrow opening. Open it, follow the passage and jump into the water beyond. Swim to the other side and climb the ramp to locate the mechanism.
Tomb of Snefru
The entrance is on the north side of the smooth pyramid in the south of Saqqara Nome.

Follow the hallway, crawl through the small hole and continue. You’ll come to a pit that you can climb up to get some loot above you, or you can use the hidden door to your right to head towards the tablet. Jump over the water, climb up, and go through the small hole to emerge into a room with some hanging platforms and moving flask shelves.
Grab one of the rope spools from the stone platform where you entered the room and drop down onto the hanging platform to the right. When it hits the ground, drop the spool to the ground to temporarily hold it in place, then drag the jar rack over it and climb up to the highest hanging platform to reach the next room.

Crush the jars that block your path. There’s a cobra there, so keep swinging your weapon after breaking the jars!
In the next room, climb onto the hanging platform to your right and break the large jar on it, then drop down to allow the other platform to drop. Take the rope spools and take them to the next room and use them to weigh down the lower platform; four should be enough.

Climb up to the upper hanging platform to find the tablet.
Do you need more help? Our Assassin’s Creed Origins walkthrough and guide will take you through every step of the main story and quests, while we also have guides on how to get XP and level up, plus explanations on how Assassin’s Creed Origins side quests work , plus how to obtain crafting materials. and animal products, and even complete solutions and walkthroughs for all of the tombs, silica, and anchient mechanisms in Assassin’s Creed Origins. We also have a list of all the Papyrus Puzzle locations, the legendary and cursed weapons from Origins and how they are acquired, and finally a detailed page on Phylakes, Phylakes’ Prey, and how to get the Black Hood outfit.
Tomb of the nomads
The entrance to the tomb is located on the western spur of the Isolated Desert, between the Qattara Depression and the Black Desert.

This is perhaps the shortest and simplest of all the tombs. Once inside we take the path to the right. He ignores all warnings about impending doom and follows the path to a quiet pond; The tablet is submerged behind the rotting wooden panel on the other side of the pool.

Tomb of the Cynic
This tomb is located in the northwest of Uab Nome. Keep an eye out for lions prowling around the entrance and further inside.

There are no puzzles to solve in this one: it’s just a straight, albeit lion-infested, race to the tablet. The first area contains a pair of lionesses, so kill them or run into the tunnel on the left and then continue inside. The dimly lit cave ahead contains a lion and the tablet is at the end of the passage to your left.

mountain of the dead
This tomb is located in Siwa and is part of the Hideaway side quest.

As you approach the mission marker, a cutscene will automatically play. When it’s done, enter the tomb, and when you reach the dead end, go through the cracked wall to your left and head into the next room. Break the jars in the corner and move the jar rack to access the room below.

Great Sphinx
The entrance to the final tomb is on the left buttock of the Sphinx, but is only available after activating all the other mechanisms and locating the 12 stone circles for the Bayek’s Promise side quest.

Go in until Bayek mutters that it’s a dead end, then crawl through the hole in the alcove in the corner.


When you come out of the tunnel it is already very dark and you will only be able to see a few meters in front of you even with a flashlight. Turn right and walk towards the wall, then turn right and follow it until you reach a door. Head over and interact with the map inside.

The map will rise to reveal a door; Move forward and activate the final mechanism to earn the legendary Isu Armor suit.
Categories: Guides
Source: ptivs2.edu.vn