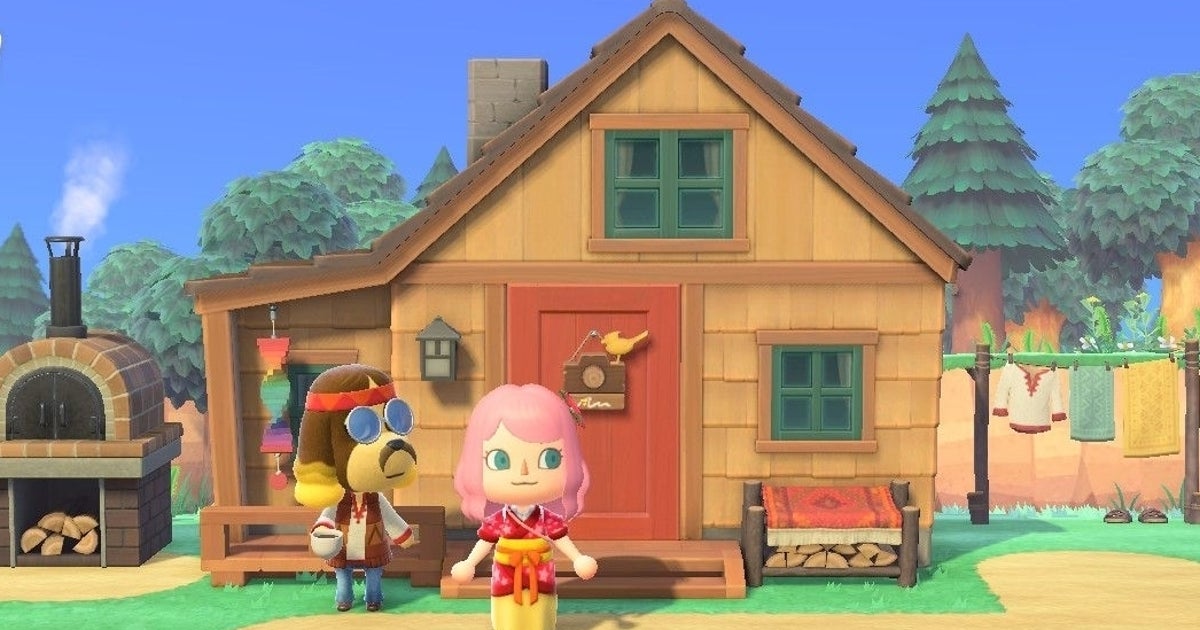
Harv’s Island is the home of Harvey the Spaniel and Photopia in Animal Crossing: New Horizons.
Photopia is where you can create settings to take photos of both yourself and the villagers who live on your island. You might even find yourself unlocking a villager poster or two when using Photopia…
Finally, Harv’s Island is the only place where you’ll be able to access Dodo Airlines’ Dodo delivery and settlement services.
In this page:
How to unlock Harv’s Island in Animal Crossing: New Horizons
If you want to visit Harv’s Island in New Horizons, you must sell your first three plots of land to new villagers on your island.

Harvey will visit once the three original housing plots are full.
Harvey will randomly appear on your island after the third villager, bringing the total number of animal villagers on your island to five, moves in.
Talk to Harvey and he will tell you about his own house on the island and invite you to visit it.
Once you’ve finished your conversation, you can visit Harv Island, for free, whenever you want.
How to visit Harv Island in Animal Crossing: New Horizons
Once you’ve met Harvey on your island in New Horizons, it’s time to visit his house and check out Photopia. You can fly to Harv’s Island for free, so don’t worry about having to spend Bell or Nook miles.
To do this, head to the Dodo Airlines airport and chat with Orville; First, you’ll need to select “I want to fly!”, then “Visit Harv Island.” and finally, ‘Time to take off!’

You will eventually get there…
Once you’ve made your way through this conversation tree, you’ll be flown to Harv Island, where you can participate in Photopia.
If this is your first time visiting Harv Island, you can talk to Harvey to learn more about Photopia or you can walk right in and start taking pictures.

Success!
Photopia in Animal Crossing: New Horizons explained
Now that you’ve arrived at Harv’s Island, it’s time to learn how to use Photopia in New Horizons.
Choose a set
Your first task in Photopia is to choose your set: Harv’s House has the same layout as a full player house, meaning you have an upstairs room, a basement, and four downstairs rooms to choose from.
Since you can change both the wallpaper and the flooring, this choice will mainly depend on the amount of space you need for your idea.


There are some rooms that you can use.
Place furniture, change wallpaper and floor.
Once you’ve chosen your setting, it’s time to start setting the stage for your photography. To do this, press the down button on the D-Pad like you would at home; the only difference is that your avatar remains on the screen.
Item storage is accessed the same way you would at home, but unlike home storage, you’ll find that you can use every piece of furniture, rug, flooring, wallpaper, and clothing item you can find in your Catalog. . This includes items you no longer own.

You will also be able to access all the insects, fish, fossils and sea creatures that you have donated to the Museum.

Finally, the ‘Other’ tab allows you to access tools, KKSlider logs, crafting materials, and other items, such as fruits and flowers.
However, unlike your island, you have an unlimited supply of each item, meaning that if you want to fill a room with Apple chairs, you can do so.

Beautiful.
You also have the ability to customize any item that offers the option without the use of customization kits.
You can do this by selecting the furniture while it is in storage or after you have placed it in Photopia.
Either way, the customization screen will open and you will be able to select which furniture variant you want to use.


You can still customize elements in Photopia.
Carpets, wallpaper, and flooring work just as they do when you place them inside your home.
Once you’ve placed an item, rug, wallpaper, or floor in a room in Photopia, it’s there forever, just like your island home. This means you can leave Photopia whenever you want, without having to worry about your equipment being dismantled.
Add villagers to your set
With the furniture in place, it’s time to add some villagers to your photo and there are two main ways to do this.
The first is to open the storage cabinet once again and, this time, move until you reach the small head of the cat.
This is the ‘Residents’ tab and allows you to create models of the villagers currently living on your island in Photopia.

The second method is to use Animal Crossing amiibo, both the cards and the figures.
You’ll notice that during place mode, there is a small amiibo icon in the bottom left corner of the screen.
This icon means that if you place an Animal Crossing amiibo on your chosen controller’s NFC touchpoint during this mode, a model for the villager associated with the amiibo will appear in your Photopia set.

Organize the villagers and your avatar.
Once you’ve decided which villagers deserve to appear in your photo, it’s time to arrange them.
To move a villager around the set, drag the cursor towards them and then press and hold the A button. The villager will now be hanging in the air and you can move them to wherever you want them to be.
If you place the villager on top of a piece of furniture, such as a bed or chair, he will lie down or sit on it.

It is also possible to change both the villagers’ and Reaction’s clothes.
For clothes, press the X button while you have the villager selected, which will open the closet.
Now, just like you would with your own avatar, you can browse through all your clothes and experiment with outfits until you find something you like. When you’re ready, all you have to do is press + and the villager will wear the clothes you’ve chosen in Photopia.

To change a villager’s expression, you must once again select the villager, but this time you must press the ZR button to open the Reaction menu.
Here you can try different reactions and choose the one that best suits your scene.

Finally, you can also rotate villagers by simply pressing the A button.
All of the actions described above can also be performed with your avatar, allowing you to also become a focal point of the scene.
Taking a picture
When you’re ready to take a photo, you can simply press the capture button on your chosen controller or you can use the Camera app on your Nook phone to take more control of your photo.

You have the ability to move the camera, zooming in and out, to make sure the shot is perfect.
If you want your villagers to look at the camera, press the R button and they will turn their heads towards you. If you later decide that you’d rather not have their attention, you can simply press the same button again to have them look away.
This also includes being able to add a frame and time and date to the photo, as well as applying a number of different filters, including monochrome and vintage.

Finally, when you have everything set up exactly how you want, you can take the photo.

.sotohp ylevol ekat nac uoY
Villager signs in Animal Crossing: New Horizons explained
After taking a photo at Photopia on Harv Island in New Horizons, you’ll unlock the ability to purchase villager posters at the Nook Stop in Residential Services or in the Nook Shopping app on your Nook Phone.
Each villager sign costs 1000 bells and you can find them by selecting “Special Goods” before moving directly to the “Signs” option.


The list of villager posters can be found in the “Special Items” section of Nook Shopping.
Villager Posters are larger versions of the framed photographs, which the villagers will give you once you become their best friend. While these posters are easier to obtain, they lack the special note hidden in the back of the image, which will give you more information about your favorite villagers.

If you have a new villager moving to your island after you have unlocked the villager posters, then you should return to Harv’s island and use his villager model in Photopia.
Doing this will automatically unlock this villager’s poster immediately, allowing you to purchase it without having to wait. However, when you purchase a poster, you will have to wait a typical day for it to arrive in the mail.

Place new villagers in Photopia to unlock their signs.
Dodo delivery and settlement in Animal Crossing: New Horizons explained
Dodo Delivery and Settlement are two exclusive services that, in New Horizons, Dodo Airlines currently only offers on Harv Island.
dodo delivery
Dodo Delivery allows you to mail items from your inventory to your home from Harv Island. The items you send will appear directly in your home storage, meaning you won’t have to wait to use them again.
To use Dodo Delivery, talk to Wilbur while on Harv Island and select the ‘GO to Delivery!’

This will open your inventory, allowing you to select the items you want to send home, and when you’re ready, press “Confirm.” Wilbur will now take care of the rest and you can find the items in your home storage when you return home.

Settlement
Clearance works exactly the same as the Nook’s Cranny Drop Box and any items sold through this service will have the same lower prices that apply when using this drop box.
The Bells you earn, just like with the Drop-Off Box, will be automatically sent to your Bank of Nook account the day after you use the settlement service.
To use Clearance, talk to Wilbur on Harv’s Island and select ‘Go to Clearance!’

Your inventory will now open and, as if you were using the drop box, you will be able to select which items you want to sell and see the number of bells you will receive in the bottom left corner.

It’s important to remember that both services are currently only available on Harv’s Island, meaning you can’t use them on a Mysterious Island or when visiting another player’s island.
The Animal Crossing 2.0 and Happy Home Paradise update is here! We can help you with the new additions, including where to find Brewster, Gyroids, new villagers, ordinances, new fences, storage shed, new hairstyles, Froggy Chair, group stretches, and Kapp’n boat tours. Cooking can now be unlocked, so you need to know how to make flour and sugar, as well as how to grow carrots, potatoes and tomatoes. In the meantime, if you’re new to Animal Crossing, our New Horizons tips can help you with the basics. From the beginning, there are fish and insects to catch, flowers and fruits to grow. A long-term goal is to increase your Happy Home Academy score. Finally, you need tools like the new ladder and pole to fully explore.
Events held on Harv’s Island in Animal Crossing: New Horizons
Many events take place throughout the year in New Horizons, from fishing tournaments to fireworks shows, and Harv Island has been home to one of them.
The Wedding Season event runs throughout June and tasks players with traveling to Harv Island, so they can build a wedding setting in Photopia for some very special guests.

Wedding season occurs in Photopia.
Currently, we don’t know if any more events will be held on Harv Island, but it certainly seems like the place to hold month-long events without affecting life on your island too much.
Categories: Guides
Source: ptivs2.edu.vn